Records workspace
Filter and edit records with bulk selection and a connected detail pane.
Screen preview
The image below shows the TypeScript screen. Open the web preview to try its controls; it runs the same source included in the starter.
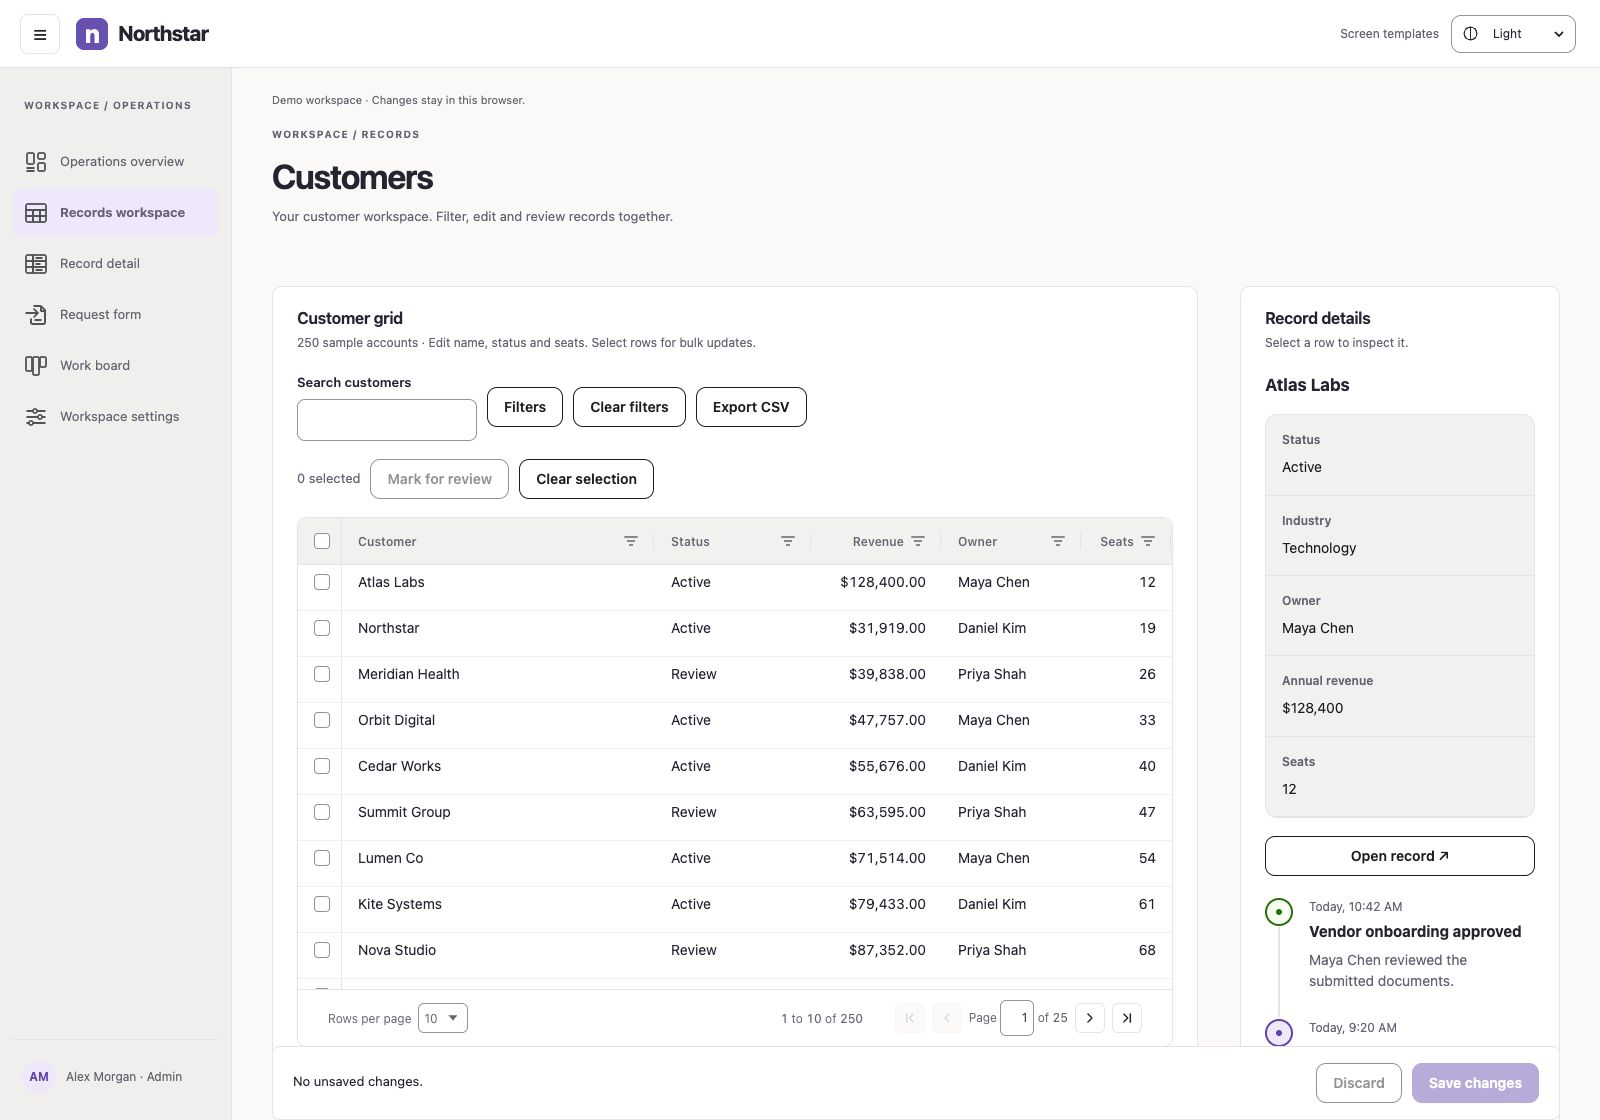
Web components used
BluGrid · FilterBuilder · Descriptions · Timeline
createAppLayout, createPageLayout and createPageHeader provide the shared structure. Each component is also available independently from @blukavantui/web. Import the grid from @blukavantui/web/grid.
Connect your API
Connect the screen to your own data and save actions. Handle permissions and validation on your server.
Use this TypeScript screen
- Download the complete starter and run
npm ci, thennpm run dev. Choose Records workspace under Screen templates. - To move it into an existing web app, copy
src/templates/records.tstogether withshared.tsanddata.ts. Install@blukavantui/weband import@blukavantui/web/theme.cssplus@blukavantui/web/grid.css. - Call
mount(host, env)with a connected HTML element. Useenv.urlfor your screen routes andenv.galleryUrlfor the header link. Calldestroy()when removing the screen.
The single-file download needs the shared files above; the complete starter contains everything.
OutSystems version — separate setup
In Service Studio, copy TemplateRecords and the shared TemplateLayout from BluGrid_Sample. Retain the referenced BluKavantUI libraries selected by that screen, including BluGrid_Lib. Foundations belong to Core; layout, input, data, feedback and media Blocks live in their corresponding libraries. Replace sample reads and saves with your application’s server actions.
These instructions apply only to the OutSystems screen.
Open OutSystems screen ↗